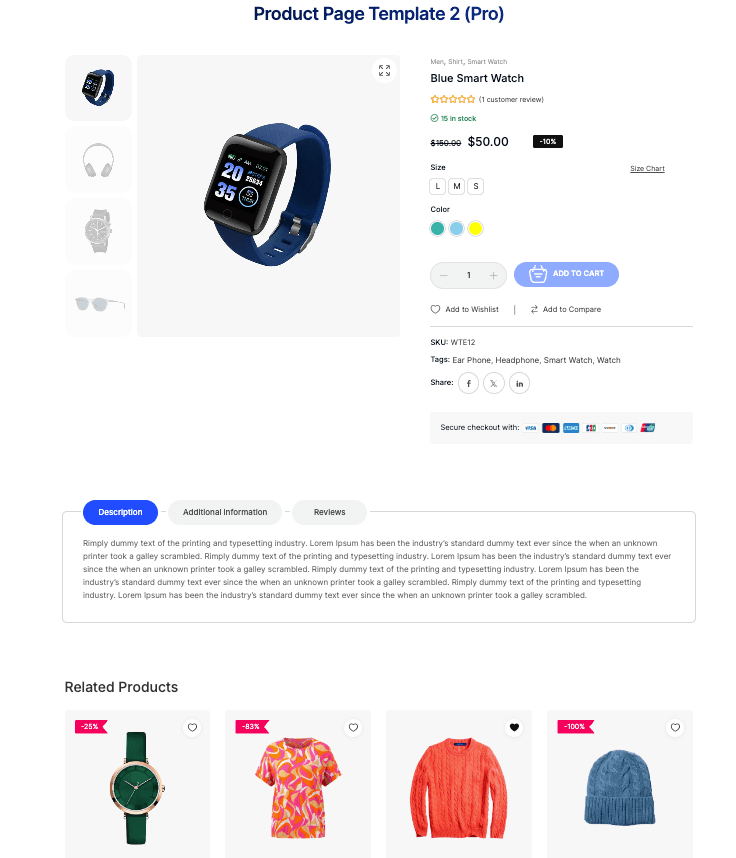
What would your store look like if you could customize each product page to reflect your brand’s unique style and offer customers an improved shopping experience?
Running a WooCommerce store doesn’t have to feel challenging. One of the most impactful changes you can make is to personalize your product pages. While WooCommerce provides a solid foundation, the default product page templates may not provide the flair or functionality you desire. Customizing these pages can not only enhance your brand image but also increase customer engagement and ultimately drive sales.
The great news is that with tools such as the ShopBuilder plugin, you can create stunning, tailored product pages without diving into extensive coding. In this article, you will discover why customizing your product pages is essential and how to do it step-by-step.

Understanding WooCommerce Product Pages
The WooCommerce product page is where customers find detailed information about a specific product. This should not be confused with the shop page, which displays a list of all your products. The product page houses everything customers need to know to make informed purchasing decisions, including images, descriptions, pricing, and options for variations.
Why Customize Your Product Page?
Customizing your WooCommerce product page can seem like an unnecessary task, especially if you currently have the default template. However, the advantages of customization extend beyond aesthetics. Here are some compelling reasons why you may want to consider it:
Brand Consistency
One of the primary reasons to tailor your product pages is to ensure that they reflect your brand’s identity. By aligning your product pages with your brand colors, fonts, and design elements, you create a harmonious and professional look throughout your site. This consistency can instill trust in your customers and encourage brand loyalty.
Better Customer Experience
Upgrading from the default layout can significantly enhance the shopping experience for your customers. By showcasing high-quality visuals, videos, and product swatches, you help customers gain a better understanding of your offerings. A well-structured product page can make their decision-making process more fluid and enjoyable.
Increased Conversions
Customization can lead to improved conversion rates. By including elements such as user reviews, related products, and variation swatches, you can effectively guide customers toward making a purchase. These enhancements not only make your product pages more informative but also create an enticing shopping atmosphere.
More Product Information
Simply providing basic information may not be enough anymore. Enhancing your product pages with videos, 360-degree images, and FAQ sections allows you to deliver comprehensive product information. This depth of insight can help answer potential customer queries and reduce abandonment rates at checkout.
With these advantages in mind, let’s explore how you can seamlessly customize your WooCommerce product pages using the ShopBuilder plugin.
Step-by-Step Guide to Customize WooCommerce Product Pages
Customizing your WooCommerce product page can be straightforward, thanks to various WordPress plugins. ShopBuilder makes this process user-friendly, even for those without coding skills. Let’s break down the steps you need to follow.
Step 1: Install and Activate the ShopBuilder Plugin
To begin your customization journey, you first need to install the ShopBuilder plugin. Luckily, it’s free and straightforward to set up. Here’s how:
- In your WordPress admin dashboard, locate the Plugins section.
- Use the search bar in the top right corner to find ShopBuilder.
- Once you see ShopBuilder – WooCommerce Page Builder for Elementor, click Install and then Activate your plugin.
Step 2: Install and Activate Elementor and WooCommerce
After activating the ShopBuilder plugin, ensure you have both Elementor and WooCommerce installed, as these will be essential for the next steps. Here’s how:
- On the same Plugins page, search for Elementor. Click Install, and then Activate.
- Next, look for WooCommerce and similarly install and activate it.
Step 3: Designing Your WooCommerce Single Product Page
The design phase allows you to create a tailored product page that fits your branding and informational requirements. Let’s walk through it:
- From your WordPress admin dashboard, navigate to ShopBuilder, then go to Template Builder, and click Add New.
- In the template settings that appear, set the Template Name to something like Product Details Page Design, and for the Template Type, select Product Page.
- You can then preview any product by choosing one. With Elementor as your default Editor Type, ensure that the Set as Active Template option is turned On.
- Choose from five pre-designed layouts, or select Blank Template to start fresh. Click Save, then Edit with Elementor.
- When the Elementor Dashboard appears, click on the plus (+) sign to determine how many columns you’d like to set for your product page layout. For this guide, we’ll use two columns.
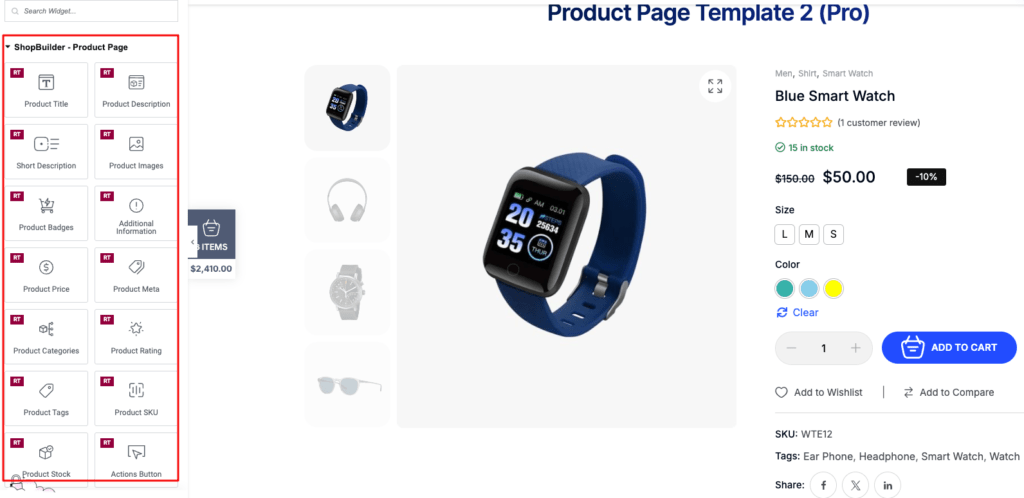
- Drag the following elements into your layout:
- Product Image in the first column
- Product Title in the second column
- Below the title, add Product Price
- Follow up with Product Rating, Short Description, Product Add to Cart, and Product Tabs in that order.
At this point, your product page layout is starting to take shape.
Customizing Your Page Elements
Now that you have the structure laid out, you’ll want to customize each of these elements to capture your brand’s essence:
- Start with the Product Title. Click on it and select the heading tag (H1).
- Navigate to the Style tab to choose your preferred font family and weight. Adjust the color to fit your branding, and write down the color code that appears at the bottom of the Color Picker.
- Repeat this process for the Product Price, ensuring it maintains consistency with the Product Title.
- For the Product Rating, select your desired typography color and star icon color.
- Customize the Short Description by selecting an appropriate font style.
- Next, adjust the Product Add to Cart button by setting its height and overall styling.
- After making all your customizations, click the Update button located at the bottom left corner to save your changes.
Increasing Your Sales with Custom WooCommerce Product Pages
The advantages of working with custom WooCommerce product pages go beyond aesthetics. Not only do they contribute to a well-rounded shopping experience for your customers, but they can also significantly boost your sales. Being able to effectively communicate the value of your products through a well-designed and informative page nearly guarantees that potential customers will be more likely to convert.
Using plugins like the ShopBuilder can streamline this process, helping you save time while achieving superior results. The tools at your disposal ensure that customizing your WooCommerce product pages is no longer a daunting task but rather an exciting opportunity to showcase your brand.
As you embark on the journey of revamping your product pages, consider each change you make as a step towards fostering a unique and engaging shopping environment. Your efforts can yield a more immersive experience for your customers, leading to increased satisfaction, loyalty, and, ultimately, sales.
By customizing your WooCommerce product pages, you are not just enhancing your website’s appearance; you are actively building a relationship with your customers by providing them with exactly what they need. It’s about creating a shopping experience that resonates with them and makes them want to return.
Best of luck as you create your own stunning WooCommerce product pages. With the methods outlined above, you’ll find that your customization adventure is both fulfilling and rewarding.


